Blog on a Log
Thursday, December 30, 2010
Cold September Rain
I woke up this morning to a steady rain outside my window. Since I had the joyful experience of having nowhere to go today I snuggled under my covers and hit the snooze a few more times, but when I finally emerged into the gray September world I got thinking about those less lucky than myself—people with places to be and things to do on this rainy fall day.
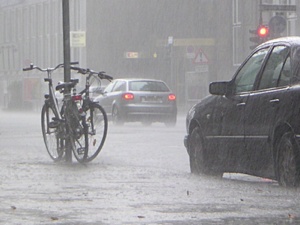 If you use your bike as transportation, rain can seem particularly painful. Riding your bike on a clear, crisp fall day is great, but when you’re soaked to the skin the climate controlled cars “sharing” the road beside you can elicit major jealousy pangs. Minimize your pain and maintain your riding elitism by preparing for your rainy-day rides
For You
Rain Gear – This is what it’s made for. Go for shorter-cut jackets (waist- instead of thigh-length) for the best freedom of movement and don’t neglect the rainpants. Breathable raingear will help prevent the feeling of being trapped in a sweaty garbage bag while exerting yourself.
Waterproof Bag – A truly waterproof bag is invaluable when biking in poor weather. This multi-purpose drybag form SealLine does double duty as both a commuting backpack and a portage bag. You can push through the trip itself, but it’s much easier when you can rely on dry socks and shoes when you reach your destination.
Dry Socks and Shoes – on that note, you should probably bring some. Your feet are next to impossible to keep dry in this situation
Travel Towel – a lightweight, quick-dry towel will help dry up any parts of you that did get wet—your face, your hands, etc—so you don’t have to find yourself crouched underneath the bathroom’s automatic hand dryer.
Wet Wipes – How many times can I mention wet wipes on this blog before this actually becomes a blog about wet wipes? Hopefully a few more. To make a long story short, just because it’s raining doesn’t mean you won’t be exerting yourself, and a way to freshen up when you reach your destination and peel off those layers will be welcome.
For Your Bike
Fenders – bike wheels will shoot dirt and water up at the rider from in front and behind. No matter your level of rain gear, it’s a less than pleasant sensation. If you bike doesn’t already have fenders, it’s worth investing in a set.
Plastic Bag – unless you have the benefit of covered parking for your bike, bring along a plastic bag to cover the seat while you go about your business. When you have to get on your bike to come home, you’ll appreciate the dry seat.
LED lights – legally necessary for biking at night, bike lights will also serve you well during rainy days. Maximize safety by ensuring drivers on the road can see you in the reduced-visibility weather.
Rain Biking Tips
- Remember that stop time increases in wet weather—sometimes up to 10x. Travel slower, begin your stops sooner, and dry off your tires prior to your intended stop point by lightly pumping the breaks a few times.
- Visibility and control will be worsened for the cars on the road as well—give them even more space than usual to ensure no unfortunate accidents.
- Puddle depth and content are difficult to estimate. Avoid puddles if possible (while not conflicting with tip #2). If you must ride through a puddle, do so slowly – you have no idea the potholes, garbage, or glass that may rest underneath.
Photo via hAdamsky on Flickr
Thursday, December 30, 2010
Backpacking Basics: Which Packs Should I Take?
One of the most common questions I get from first-time travelers is some variation of "how do I deal with all my stuff?" It's not always clear what combination of backpacks, luggage, daypack and safety accessories will combine for the most lightweight, logical and adaptable means of carting your gear while travelling. Should you take a backpack or suitcase? A separate daypack or one that attaches to your main bag? Is that strange-feeling moneybelt really necessary?
Everyone's packing needs differ slightly, and there's no a one-size-fits-all answer, but in my experience a combination of 3-4 pieces of ‘luggage' (for lack of a better inclusive term) is all that's necessary for the most backpackers to undertake anything from a 12-day to a 12-month adventure.

The backpack wall at Wilderness Supply Thunder Bay
Backpack
First and foremost, a travel backpack is your most important piece of luggage. The right bag will depend on your height, size, gender, gear, and capacity needs - all factors too specific to cover well in a blog. Ideally I like to travel with a women-specific pack around 50L, but that's far from a universal recommendation. Suffice to say that if you are planning a trip (especially a long one) you should invest in a quality travel backpack, and come in person to a store specializing in travel bags to get fitted before buying.
Backpacks don't have to break the bank, but you'll be happier with a bag fitted specifically to your needs than a pack salvaged from some relation's decades-past expedition. I learnt the hard way - the cost I saved re-using an old family pack did not make up for weeks on the road with sore back, shoulders and legs lugging around an unwieldy, poor-fitting pack. (Support systems have come a long way in the last few decades. Just saying.)
I've had people insist a good suitcase is preferable to a backpack, but having travelled both ways I still come down solidly on the side of a backpack. A suitcase may work fine if your trip only takes you from plane to taxi to hotel, but not every travel location will present the smooth, even floors and handy escalators of an airport, and when you're dragging your gear up a hill to the hostel or across a ragged, cobbled street the ‘ease' of a wheeled suitcase begins to pale. If you must travel with a suitcase, at least be sure it is rugged enough to stand up to the challenge. Test that the handle is long enough that you can stand up comfortably while pulling (to prevent back strain) and that the full suitcase isn't too heavy to manoeuvre.
Your main piece of luggage should be large enough to hold every item you're bringing on your trip. This will vary according to the length, style and destination of your trip. I promise to do a video soon on the best way to pack the internals of your bag, but for today let's just state your pack should be big enough to hold all of your gear, and leave it at that.
So you've got a bag full of your stuff, but you aren't going to carry around your entire rucksack every time you leave the hostel. You're better off to lock up your backpack securely in your hostel and use a smaller bag for your daily excursions (A packsafe to lock up my backpack when I'm not around is one of my favourite travel accessories, and has rendered me the target of much hostel room and bus-stop envy). Enter your second necessary bag: a daypack.
Daypack
A small backpack makes a good daypack, but as a female traveler I prefer to take a large, functional purse. I feel and (also important) look less like a tourist, making me less of a target for potential pickpockets and thieves. If you're going this route make sure your bag is an appropriate size and design to accommodate a traveling lifestyle, and ergonomic enough to protect your shoulders and back from strain (Ameribag is my personal preferred brand).
Some travel backpacks come with removable daypacks - just make sure if you go this route you can fit all your gear into the main compartment of the bag minus the daypack. Otherwise when you want to make use of the smaller bag you won't have anywhere to put the leftover gear.
Moneybelt
A moneybelt (or variation thereof) comes in as our third necessary bag. Not classified as ‘luggage,' per se, safety accessories still play a crucial role in transporting your gear while traveling. Moneybelts have been a staple of travelers for years, and for good reason. No matter your feelings on the fashion statement of carrying the equivalent of a thin fanny pack down your pants, they remain the most relied upon method of keeping important and valuable documents and money protected.
NEVER leave your passport, credit card, or money in a hostel or hotel, even in a ‘secure' room. Someone always has access to such locations, and it's better to be safe than sorry. Carry a moneybelt, and get used to keeping it on at all times (yes, even when you sleep). I've known various people who were robbed while traveling (it's an unfortunate reality) but without fail none of them were using their moneybelt when their valuables were stolen.
One of the biggest frustrations with moneybelts comes from an inability to easily access your cash or cards when you need them. One fix is to keep a small amount of cash and a few non-vital but often used cards, such as a student ID, in a small wallet stored in an internal pocket of your day bag/purse. You may lose this wallet to a swift-fingered thief (though I never have) but if so you won't have lost enough to cause you much pain. Most importantly, in your day-to-day activities you can buy some lunch or get into a museum without digging around in your pants, once again contributing to not feeling or looking like a good ‘mark'.
The combination of backpack, daypack and moneybelt is enough in most situations. However if you are venturing into an area of the world you deem less safe, you might be wise to add one more safety piece to your ensemble. In higher-risk areas (and even in low-risk areas, if you're of a worrisome personality) it's a good idea to have a backup safety accessory in case you are targeted by a particularly thorough thief.
A single safety accessory is good, but it you do end up in the unfortunate position of being robbed or mugged most thieves expect you to be carrying a moneybelt. A secondary safety item may escape their notice, especially if stored somewhere unexpected such as a belt, bra, or sock. Use this backup location to hold minimal resources for a worst-case scenario: local currency for a taxi, the address of the nearest embassy, and a backup credit or debit card. Don't be tempted to store all your valuables (passport, etc) here - to find such items missing from your moneybelt would likely clue thieves you have a secondary location, and set them searching. The purpose of this backup is to provide for a worst-case scenario, not to hide your valuables; that's why you protect your moneybelt.
Specific needs will vary when your traveling, but this 3-4 item method is a good starting point for first-time backpackers. The combination is simple, but effective; a travel backpack, a daypack, and a safety accessory (or two) is all most backpackers need to handle all manner of personal "stuff."
B
Like our recommendations? Think we forgot an important piece of travel luggage? Join us on facebook or twitter and let us know!
Thursday, December 30, 2010
Biking Basics: A Weekend in the Life of a Commuter Cyclist
I don't ride a bike. I just don't. I also don't drink eight glasses of water a day or boycott McDonalds or any number of other things I really should do to treat my body better.
So when I heard about our store's Bike To Work Day plans, I was more than a little concerned. "Meeting at the store at 6:30? You mean AM? ..... Seriously?"
I think the early morning wakeup was a bigger concern for me than the actual ride, but at somewhere between 15 and 20 km, our loop from the store on Ferry Road down through the Forks, over to Osborne Village for breakfast and back was a little daunting for an amateur cyclist, especially one attempting to keep pace with a host of more experienced riders. By the time we made it to Stella's Café I felt pretty much beat, but more than a little proud of the accomplishment, and wondered if I couldn't find a way to become a more practiced cyclist.
"Use your bike as transport," Rachel suggested (while looking like she'd ridden the whole route with hardly any effort). "It forces you out there, and it doesn't feel so much like you're exercising."
 Bike as transport, eh? Probably an idea I should have thought of myself, but for those of us who don't cycle, it's just not a method we consider. But driven (well, you know what I mean) by the morning's success, I decided to take her words to heart, and give it a try: I'd ride my bike everywhere I went that weekend.
Armed with my free Winnipeg Biking Map (if you want Winnipeggers to do anything, offer free stuff) I set out on a 7km route from my house to Osborne Village that very night. I soon found that while taking suggested 'light traffic' routes did minimize the number of cars I was sharing the road with, it also significantly increased my travel time; I vowed to brush up on my biking hand signals and take the most direct route for the rest of the weekend.
I arrived at my destination sweaty but unscathed, with my muscles protesting less than expected from two rides in one day. I also began to recognize a few crucial items I was missing if I wanted to rely on my bike as my ride: I had a good helmet, and a bike lock, but I'd completely neglected to find lights for my bike (a necessity when out after sundown) or a way to deal with arriving at my destination drenched in sweat. This first time commuter's checklist from Resource Conservation Manitoba's "The Commuter Cyclist" includes several items I'd forgotten, and would probably have made that trek easier:
"Step 1:
- Make sure your bike is roadworthy. Take it to a bike shop if in doubt.
- If you will be riding at night, you'll need a front and rear light.
- Get acquainted with your bike. Ride a few times in the evenings and weekends to build up your comfort level.
Step 2:
- Plan your route with help from a bike map. Ask friends, neighbours or co-workers who commute by bike for advice.
- Ask about or scout out bike parking. Does your building or workplace have an indoor secure spot where you could lock your bike?
- Decide whether to ride in your work clothes or carry a change of clothes with you. If you cycle at a leisurely pace, you can wear your work clothes without breaking a sweat.
A few things to consider taking with you:
- A carrier for your stuff (backpack, basket or pannier/saddlebag)
- Bike locks (u-bolt for the frame and cable if you have quick release wheels)
- Cell phone or change for a payphone (in an emergency)
- Wind-proof or rain-proof jacket
- Bright clothing
- Helmet"
I didn't have showering capabilities at Saturday's destination, but my presentability was salvaged by a change of clothes and a package of baby wipes - I rode makeup-less, cleaned myself off, changed, and applied the necessities from a toiletries case, with no one the wiser. The late night ride home was actually quite calm and refreshing, with my newly attached lights providing some much-needed security on the road.
Sunday brought no travel needs, which the intermittently poor weather led me to appreciate. I took the day to rest my bike-sore bum and weary calves, and considered my short project.
As someone who rarely rides, I was surprised how much I enjoyed the experience. Without my own car I take the bus most places, and a bike allowed me much more freedom that I was used to. No checking schedules, no need to leave before the last bus of the night - I rode in my own time and at my own pace. As a huge bonus, cycling to the weekend's destinations took me less time than the bus, and not much more than a car - a 15-minute drive or 40-minute bus took 30 on my bike, and this with me being quite a slow rider (generally coasting around 15 km/hour). No doubt with a little practice my pace would improve, and the time difference between biking and driving would only decrease.
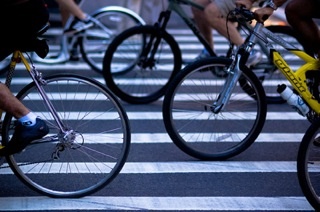
So, am I completely converted? Well, no. Long trips or poor weather can still find me heading for the nearest bus stop, but I have significantly increased the frequency and distance of my rides. Everywhere I go, people respond the way I would have a few weeks ago - with disbelief and general dismissal at my ‘insane' choice to ride to one place or another. It's a bit of a shame. Just think if everyone gave commute cycling a try... maybe our health would be better, our city greener, and our rush hours could start looking more like this:
Photo via Little Missy! on Flickr
Video via
markenlei on Youtube
Thursday, December 30, 2010
5 Ways To Celebrate Your Last Summer Weekend
For most of us, the September long weekend marks the end of summer. Kids go back to school, air conditioners wind down, and we may even pull out a blanket for those cool fall nights. But before we turn our attentions to cold-weather pursuits, the holiday weekend is a great excuse to let loose and celebrate summer one last time:
See what your city has to offer
If you can't escape to the great outdoors this weekend, try checking out the events in your local community. Though you certainly won't be alone, chances are there's something fun worth looking into. A trip to the zoo, picnic in a local park, or summertime festival are a great way to celebrate. We always tell ourselves we're going to get out way more than we manage each summer, so take this opportunity to make the most of local events and opportunities.
Hang out around a campfire
It's the perfect transitional activity - hanging around a bonfire feels decidedly summer, but the warmth will keep you toasty on these cooler evenings. Try spicing up your normal campfire s'mores by adding a new twist on an old favourite - use nutella or piece of caramilk bar instead of chocolate, or a chocolate-dipped digestive cookie instead of graham cracker.
Go for a paddle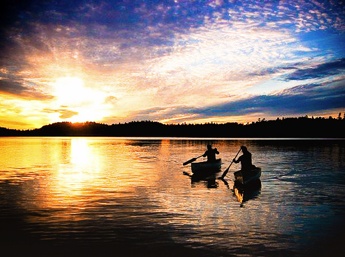
You don't have to stop paddling just because it's getting colder. Or at least, not till the water freezes (and maybe not even then?) but nothing quite beats a sunny summer paddle with a quick dip in the lake to cool off. The long weekend is the perfect time to plan a day-trip or quick over-nighter, leaving still enough weekend left over to partake in other ventures
Road trip!
Something about the fall months always gets my feet itching to be on the move. Satisfy your wanderlust by spending a few days on the road partaking in that great North American pastime, the Road Trip. Some snacks, some tunes, and you're on your way. Can't think of anywhere to head to? Canada's so beautiful, you could probably point at a map and end up with a good locale, but you can try this list of
The Best Road Trip Destinations In Canada too.
Do nothing
Sometimes the best part of summer is having the time to relax. If the onset of fall means an upswing in stress, consider spending your last free weekend taking it easy. Un-plug, relax, and unwind. Head for the great outdoors, or set up a tent in your own backyard for a bit of the outdoors right at home (with no need to organize cooking and full access to indoor plumbing). Read one more book off the list you were "sure" you'd tackle by the end of the summer, sleep till noon while you still can, or go for a walk and feel the seasons start to change. Try not checking your email, and turning off your phone. Everyone else is escaping this weekend too - chances are you'll get away with it.
Photo via Joel Bedford
Thursday, December 30, 2010
Four Water Craft Way Weirder Than a SUP Board
If you’ve been out of the loop this year, SUP boards are the newest paddling craze. Described as a cross between surfing, kayaking, and Matthew McConaughey, Stand Up Paddling is taking off as a fun way to get a great paddling workout.
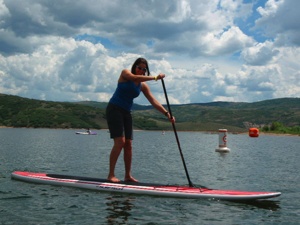
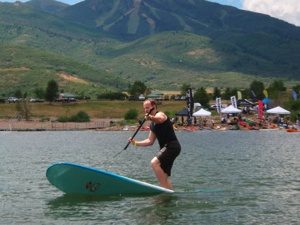
Mila and Rick try out SUP boards at Salt Lake Outdoor Retailer 2010
They may be growing in popularity, but SUP boards are sometimes still considered a little weird; depending on your locale, you may get a few questions—or at least a few looks—as you attempt to stand, balance, and paddle all at once. Still, they're far from the strangest craft out there. If you feel a little conspicuous, just think of some of the other strange "boats" that can be found paddling on the water:
Floating Chairs
File this one in the “actually a pretty awesome idea” category. You’ve got your drink, you’re keeping cool…. add a paddle to navigate back to shore and what’s not to love?
Barges
Sometimes paddling is more about the destination than the journey. I can’t imagine this driver was merely looking for a nice, relaxing cruise. Someone should teach them solo paddling strokes – things might move faster.
Inflatable Castles
These three guys took the inflatable craft theory to a whole new level. What it loses in maneuverability, it’s got to make up in post-paddling fun potential. Heck, I’d stop mid-trip to take a bounce or two.
Pumpkins
It’s hard to believe there’s enough drive for pumpkin paddling to necessitate two separate yearly regattas, but that does seem to be the case. In fact, a quick search turns up no shortage of these squash-y races. In locations all over North America and Europe, competitors compete to navigate carved-out pumpkins though the water. Of course, the first step is growing a pumpkin large enough to hold a paddler.
So if you’re hesitant to try out this weird-looking new sport, don’t be. There's lots of people out there looking way more ridiculous than you. Plus, it might be the most fun you can have out on the water (short of a floating bouncy castle, that is).


